Very Senpai

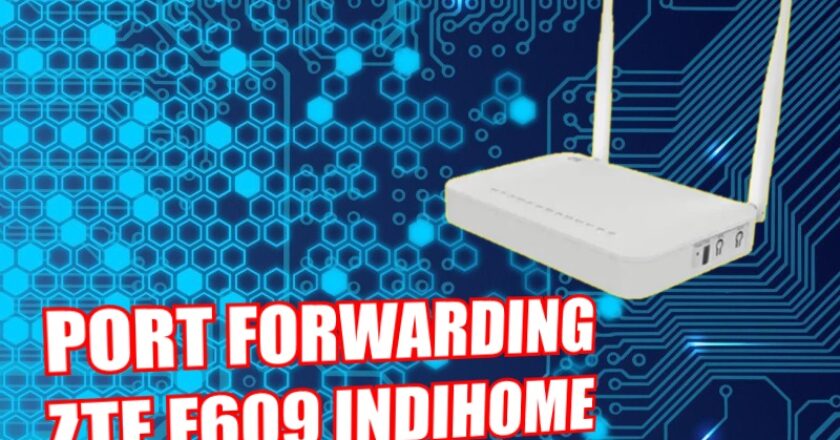
How to Port Forwarding Indihome Router ZTE F609

Hello, for those of you indihome users, you may already know that indihome provides a public ip to its customers even though it’s a dynamic type that changes. Even so, we can still take advantage of it by using DDNS to anticipate the dynamic Public IP. Well, it’s the dynamic IP problem, in this article there is a way to open a certain port for a specific IP using the Port Forwarding feature on the router (in this case, I give an example of the F609 type). By opening the port on the router we will be able to be accessed by the internet to be able to activate the service according to the port opened.

Examples of frequently used service ports:
– FTP: 21, 20
– SSH: 22
– Winbox: 8291 (Mikrotik)
– Web HTTP: 80
– Web HTTPS: 443 (SSL)

– Telnet: 23
– Mail SMTP: 25
– Mail POP3: 110
– Mail IMAP: 143
– NTP: 123
– PPTP: 1723

Furthermore, if you already know the port service you want, we will continue to port forwarding, for this time I will use a router modem from indihome type ZTE F609 (incidentally that’s what I use). Ok, next, to log in to the router, you can use a cellphone / laptop / PC that is already connected to the router, either using a lan cable or using WiFi. If you are already connected, enter ip 192.168.1.1 in the address bar as shown below.
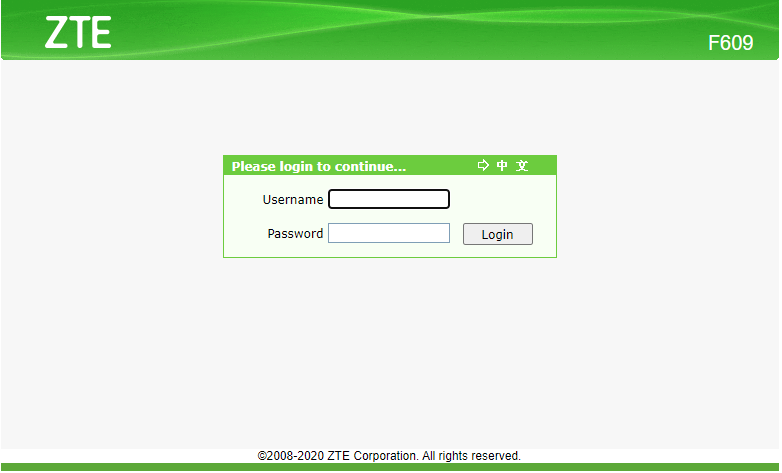
After that, enter the username and password, usually if it has not been changed you can enter the credential below:

Username: user
Password: user

Username: admin
Password: Telkomdso123

After logging in you will be redirected to the webfig from the router. Go to the Application tab > Application List > Click here to add an application. Then next you will find the display as below:
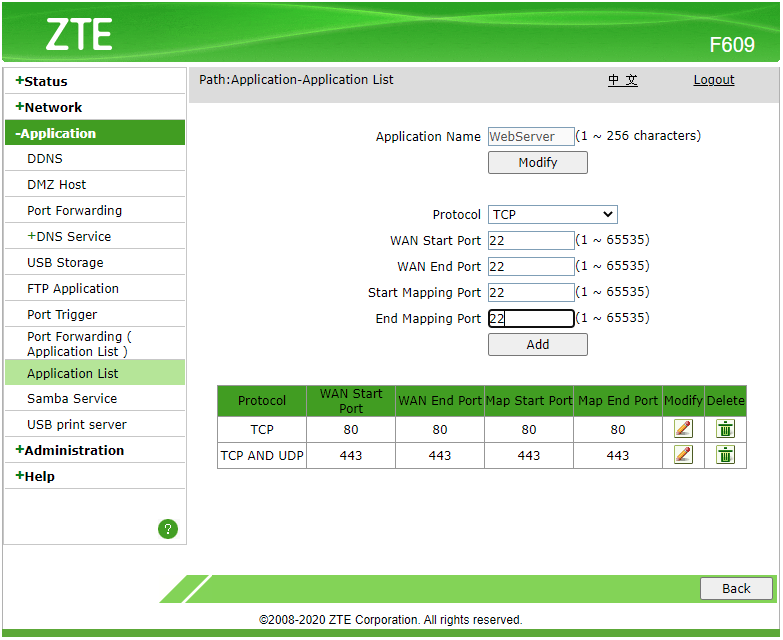
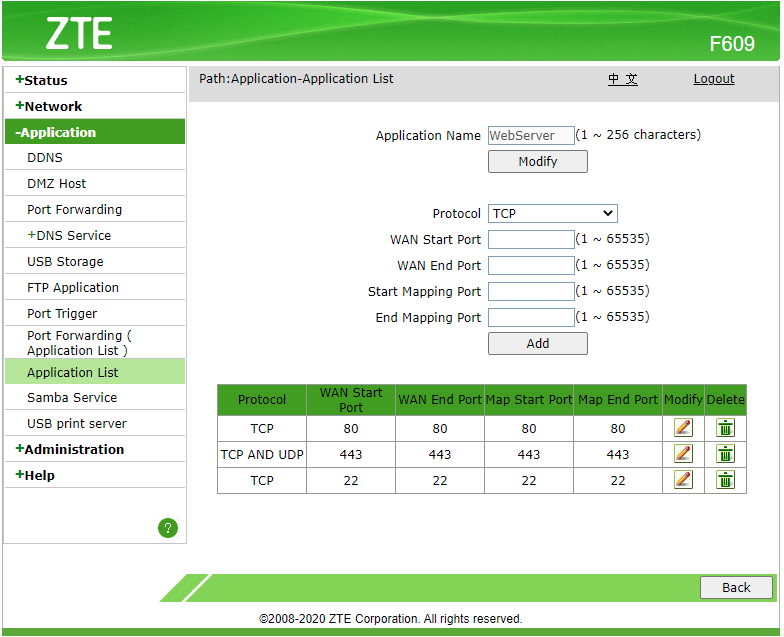
From here you can enter the Application Name (free of contents), if it is on me because I want to use for the webserver then I open port 80 and port 443. And as above I want to open port 22 for SSH, then I enter port 22 in the field above (you can fill in the port according to the service you want to use). After finishing pressing the add button, the port settings will appear in the table below as shown below.
After finishing opening the port on the Application List, then we go to the last stage, which is to apply the Application List to the IP we want. So for example, if we install a webserver connected to the router with a Static IP of 192.168.1.150, then we have to apply it to the Application List with the port that we created earlier (if on my port 80, 443, port 22 I deleted it because just make an example of it) to IP 192.168.1.150. With the example below, you enter the IP that you want to open the port in the LAN Host IP Address and then in AppName select the Application List that you have created then click Add. For example, as shown below.
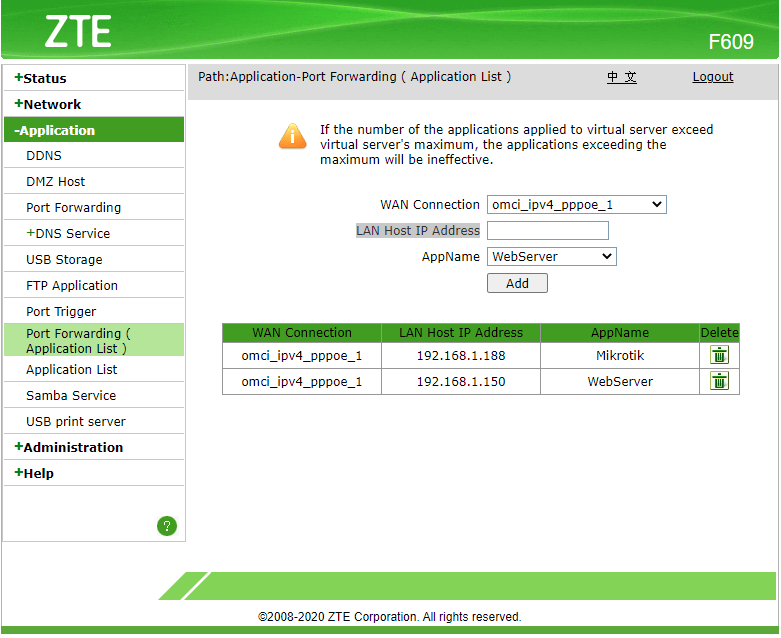
Ok now you have finished opening the port on the IP you want. For the last stage, we will check whether the rule is active or not. We can see it on the webfig also on the Application > Port Forwarding tab. If it is active, there will be a green tick on the left side followed by the rule you have created. For an example of how it looks, you can see it in the image below.
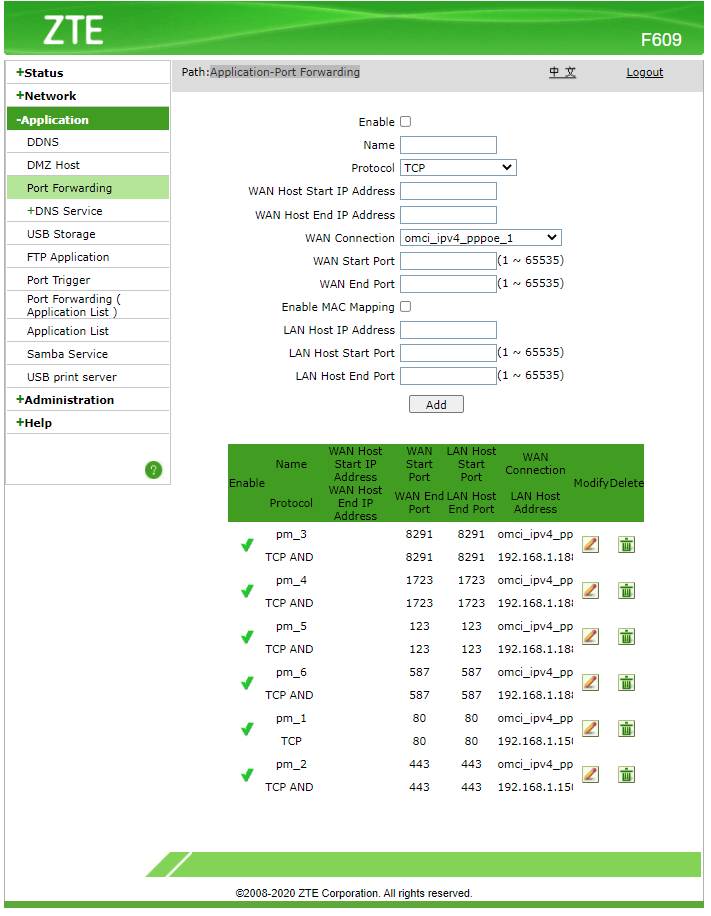
Well as you can see, the port opening rule is already enabled (in my case it is 192.168.1.150). So that’s how port forwarding if you use an indihome ISP with a ZTE F609 router. If you use another router, maybe it can also be applied with different webfig settings. In the other hand, if you understand the concept, it is more or less the same for its application, so you don’t have to worry. Ok that’s how Port Forwarding on ZTE F609!

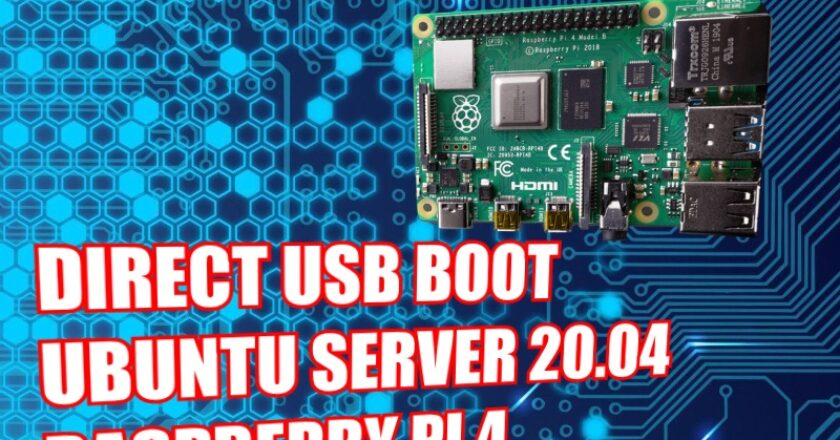
How to Direct Boot USB SSD/NVME Ubuntu Server 20.04 Raspberry Pi 4

Hallo Men, when searching for this article, it means that you are planning to use an SSD or NVME on your raspberry and you are now on the right path. Actually, maybe you know that we can use an SSD for OS with Berryboot as an OS selector when booting but for this article it’s different we will directly boot into SSD / NVME via USB without Berryboot intermediary or use a loader in micro SD so it’s more native (in my opinion anyway). So in this tutorial, you don’t need a Micro SD at all and what you need is an SSD / NVME (HDD will be ok too, but only powersupply attached) and don’t forget to use a USB adapter / converter to connect SSD/HDD/NVME to your Raspberry Pi 4 (recommended USB Version 3.0 or above).

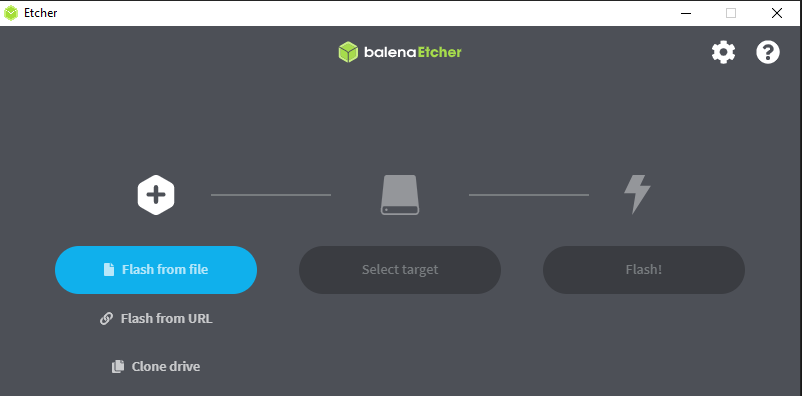
Ok, let’s keep going, it’s actually really easy to do it. First of all, you will beed to download the disk flasher first, what i use here is balena etcher you can download it here and for the Ubuntu Server 20.04 direct boot ISO image in this link download it here (or this the forum link that provide it). after you open the link, download the flasher and iso ubuntu 20.04 , and when you are finished, just open the flasher. then there will be a display like below.

After that, select flash from file then select the Ubuntu Server 20.04 ISO that you downloaded earlier and then in the target select enter the SSD / NVME that you want to flash with the ISO image. After that, in the last step, you just click flash and wait for the loading to finish.

After the flashing process is complete, plug your SSD / NVME with the adapter in raspberry via USB 3.0 for maximum performance. Wait a few moments then booting will continue to the Ubuntu Server terminal (you can also access the terminal via SSH on port 22). Next to login in the terminal you can enter the username: ubuntu, password: ubuntu.

Congratulations on successfully installing Ubuntu Server 20.04 on Raspberry 4 😀

Raspberry Pi 4 Experiment Experience (Version 4B) For Web Server

Hello everyone, this time I want to share your experiences that are also related to this website. Okay, let me tell you right away, this all started when I watched the eta prime youtube channel where he used raspberry pi 4 for the web server and I was interested in it (I also manage 3 websites) and I watched it until end. From there I was really interested in raspberry pi & I researched it. After that i find is very useful for nas server, plex server, pi hole and be used as mini PC (so awesome).

After that came the experiment to create a web server for 3 domains that I manage (i don’t want pay hosting monthly fee.. wkwk), because of my isp have public dynamic IP and mostly my internet is not use at my home, just for cctv.. hahaha (fyi: im not pay for internet, my brothers pay it). After that i manage to save some money to buy my beloved raspberry pi 4 but before that already buy the accessories first like passive cooling heatsinks & adapters (because they were sold separately, when I rolled).

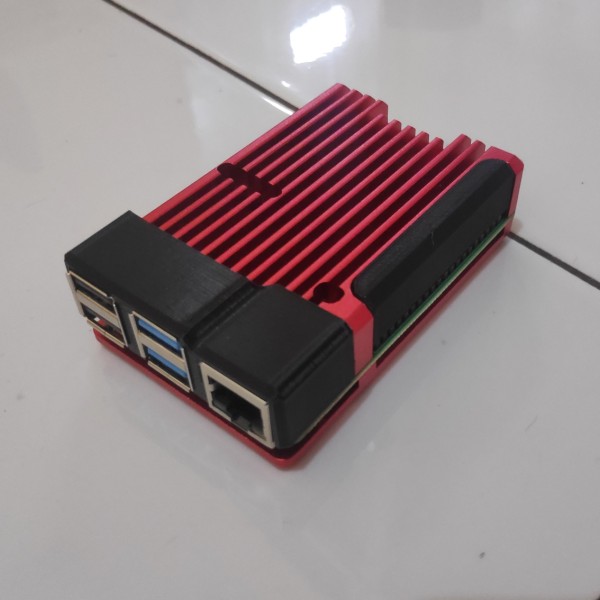
Then my money had accumulated and finally I bought the item at the online marketplace (fyi again: I bought it at the price of the 40$ & after I bought the price went up. hehe). Timeskip a few days & when it rained heavily, the courier came with the package with his raincoat (thanks, mr. courier anteraja, anyway im using free shipping). Immediately opened the package – I realized how compact this raspberry pi board is, I immediately put a thermal pad (I put thermal paste too) then I put the passive cooling heatsink. And to my surprise, it was really cool to be.. Haha. you can see what it looks like in the photo below.

raspberry pi 4 sighting with passive heatsink, uda wear gpio cover also 3D print

Well, how cool is it. Ok, I also went to the next stage, continue installing the OS and just before I was prepare the iso file for the raspberry flash and I found 2 ways, the first one using berryboot & the second using direct booting USB. After I tested both for a few days I also decided to directly boot the USB to the SSD and use ubuntu server 20.04 OS. The OS was installed next according to many tutorials that I got, I started experimenting for the webserver engine. Actually, I have installed openlitespeed but because of the support (actually the software is messed for arm version, i hope there had update in the future, I also hate to bother with the bugs) I finally used the nginx + Cloudflare webserver.

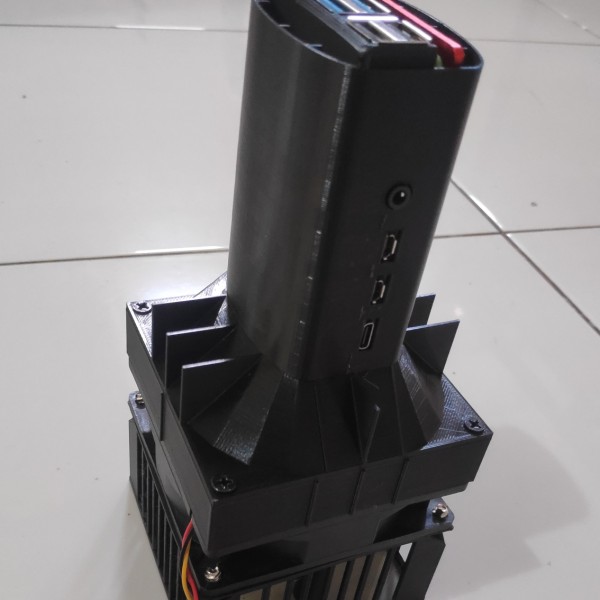
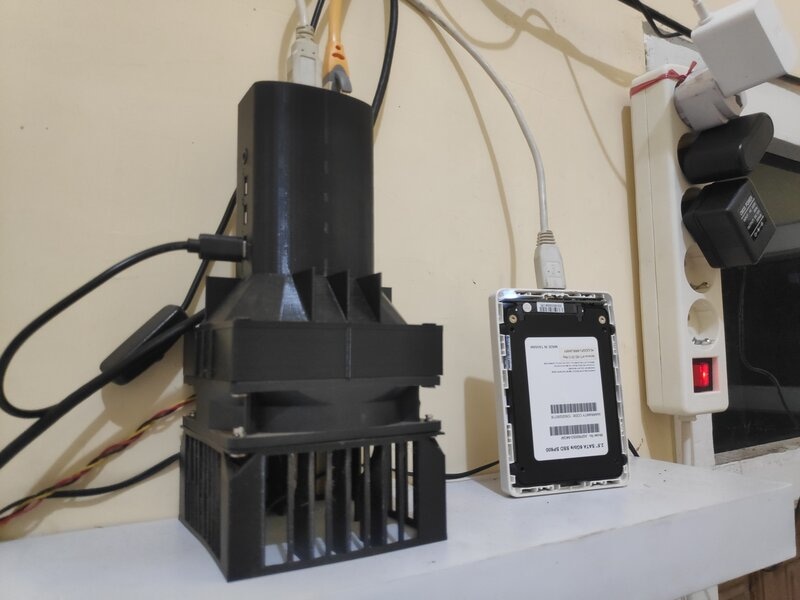
After a few days ane decided to make a 3D printing case using a 90mm fan

I start configuring everything from the firewall to the web panel (here use webmin). if you’ve ever hosted vps, the configuration is more or less the same anyway. FYI again, you guys for this website are now already hosted on my raspberry pi 4B so you can feel for yourself how the performance is (in my opinion, the bottleneck is just on the ISP, the upload speed is only 10mbps). Everything is not smooth as i planned, there is problems when making this server can run 24/7 at home, the problem I encountered is:

1. A dynamic ISP IP that changed to another after a few days but this can be solved with DDNS (I used DDCLIENT on ubuntu that I connected to Cloudflare)
2. When the server power failure & internet is off (can be solved by using a UPS, already buy one UPS now)
3. When the power failure / restart the ISP router sometimes can be a Private IP which becomes the server cannot be accessed via the internet but can be overcome by restarting the modem solution until I can get a Public IP or bridge the ISP router with a mikrotik using the REDIAL PPPoE auto script so that if I get a Private IP mikrotik automatically redial until I get a public IP (I myself use a proxy but only for notifications if the IP changes, then it will send an email to me)

the final result of the raspberry pi 4 webserver has been running 3 months since the article was created

Oh yes, for those of you who want to try to make a DIY webserver project, this is also what I will prepare in the next article, I will try to share my configurations from os installation, ufw firewall configuration, webserver configuration, webmin, ddns configuration (incidentally using a isp whose ip is going to change), and also cloudflare ssl. For this article, just share my experience when I want to make a webserver, anw hope you guys find it useful.. Hehe.

What Is an SoC? How is it different From a CPU or GPU?

Hello readers, you may used to see at the specifications of the cellphone, there must be an SoC (System on Chip). A smartphone buyer who prefers the performance of a smartphone must be the first time to see what SoC to use after that, how much it costs… Haha. That’s right, SoC is a benchmark for the performance of a new smartphone after that it is followed by others such as OS customization, screen resolution, built-in software. etc.

So what exactly is an SoC, what is the difference between the cpu in our laptops and PCs? So, if you say that SoC is the CPU of a smartphone, it’s true because SoC also includes the CPU of a smartphone, but SoC is more than that. SoC also includes GPU (for graphics process), ISP (preprocessing camera quality), Modem (connectivity process).. etc. SoC it is also often called a chipset because it regulates the CPU, GPU, DSP, ISP, Modem.. etc simultaneously.

Therefore, according to me, the selection of the SoC is quite important because it includes many factors. For example, if you are a multitasking user, choose an SoC with a strong multicore CPU, if a user for gaming chooses a strong GPU, if you are a video or photography user, you can choose the latest ISP (Image Signal Processor) that can meet your criteria (example: record 4K 60fps video, or 48MP super high resolution image photos for example).

Now there are already many SoC manufacturers that you can choose from, and the most famous Snapdragon, Mediatek & Exynos. Here the manufacture that maybe you doesn’t know, there are Allwinner, Rockchip, Intel, Marvell.. etc. All of these SoC brands have many SoC products ranging from entry level to high end and various platforms as well, there are tablets, lightweight laptops, convertibles, TV boxes. etc.

The point is that SoC is a vital part of a smartphone (and others), whether you use it only for social media or games, it will feel very impactful. Even so, according to me with the current technological developments, SoC will continue to develop and maybe later there will also be new features like in RTX (nvidia ray tracing) or tensor cores (Processors for AI computing) maybe… wkwk

That’s it, it’s been a long time since this writer went to digress where.. wkwk May it be useful tho!
Laptop, Desktop or Tablet PC? Which Is The Best?

Hello Man, Have you ever thought about buying a computer but confused about which one to choose? Before we get into the next stage now let’s think about it first, what is the purpose of buying a computer for? Is it for school, college, indoor work, field work, gaming or maybe include some of the ones I mentioned earlier? Well, from the question above, it will make it easier for us to choose the right computer.

Okay, let’s just start if that’s the case, here I assume you have the same budget for the three options below, and we just start with the choices:

  • Desktop Computers

By choosing a desktop computer you prioritize performance and the ability to upgrade hardware but sacrifice mobility. Desktop computers are suitable for those of you who use a stationary computer, it should be in one place and do not move. On the same budget, desktop PCs offer better performance when compared to laptops or tablets, then in addition, desktop computer offering good upgradeability with versatility hardware according to your needs, this day you can build a PC according to your own needs / desires. Desktop PC performance is the sweet spot if you need the best computing power that can be relied on even for heavy work loads.

  • Laptop

By choosing a laptop you prioritize mobility with few upgrade options. Laptops are suitable for those of you who use computers not only at home but can be carried anywhere, though they are usually equipped with batteries that last not too long but are suitable for mobile computing that is not too long (an average of 2 to 3 hours on load). Even though with a battery not too big you can overcome it by charging in a certain place if it supports it and because of this feature usually the laptop will be heavier to carry than a tablet or convertible laptop. Although not as fast as a desktop PC with the same budget, laptops still have decent performance for a work load not too heavy.

  • Tablet / Convertible Laptop

Choosing a Tablet / Convertible laptop means that you prioritize mobility without upgrade support. Tablets are suitable for those of you who travel a lot or do computing activities without / few places need to charge, usually tablets are equipped with a powerful battery (usually lasting 5 – 8 hours) so you don’t have to worry if your computing activities are interrupted. Although with great battery support this also has an impact on performance because tablets are more power efficient than laptops, with the same budget tablets are enough to run light to medium wokload. In addition, another advantage of tablets is that they are lightweight and do not require a large space compared to laptops.

With the list above, we can conclude that each device above has its own disadvantages and advantages and is intended according to the needs of the customer’s own characteristics. Whether it’s for gamers, work or entertainment, everyone has different computing needs.

Have you determined which one is suitable for you?

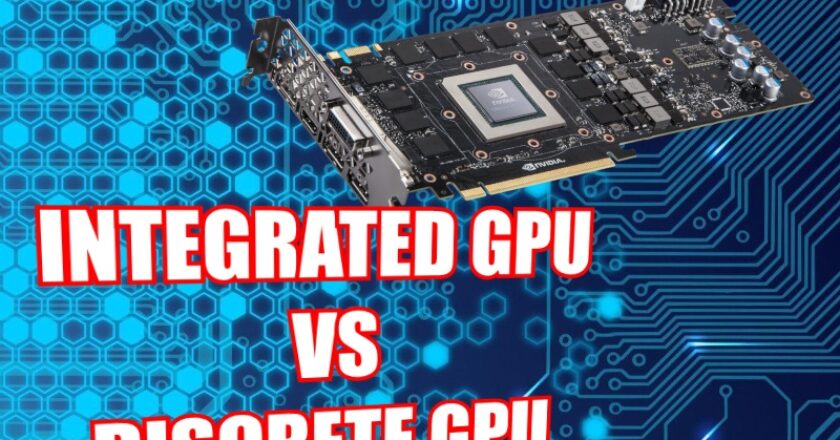
Is it better to have an Integrated GPU/APU or Discrete/Dedicated GPU?

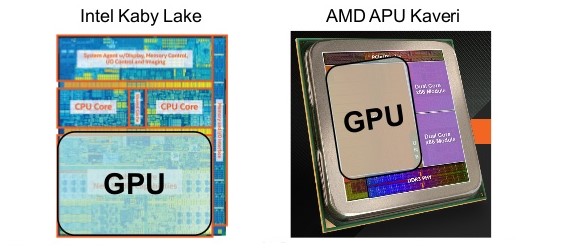
Hello Man, with the growth of fabrication technology that is getting smaller and smaller, it remind me of my first computer with a Pentium 2 CPU from Intel which is 250nm and when compared to today (2020 at the time I wrote this) it is now only 7nm. Just imagine how small it is until it is 35x smaller than 250nm. Ok enough nostalgia, but related to earlier, now with smaller fabrications, manufacturers can embed better integrated GPUs in each generation.

You must be know the PS4 or Xbox One game consoles is using integrated graphics, if you don’t know that the console uses an integrated GPU / APU and not only that the PS5 and Xbox Series X generations also follow with newer technology of course. But for PC, the current APU / Integrated GPU still can’t achieve even entry level GPU performance (Such as Vega 8 & GT 1030). Hopefully, in the future, Integrated GPUs can be more varied from low end to high end.

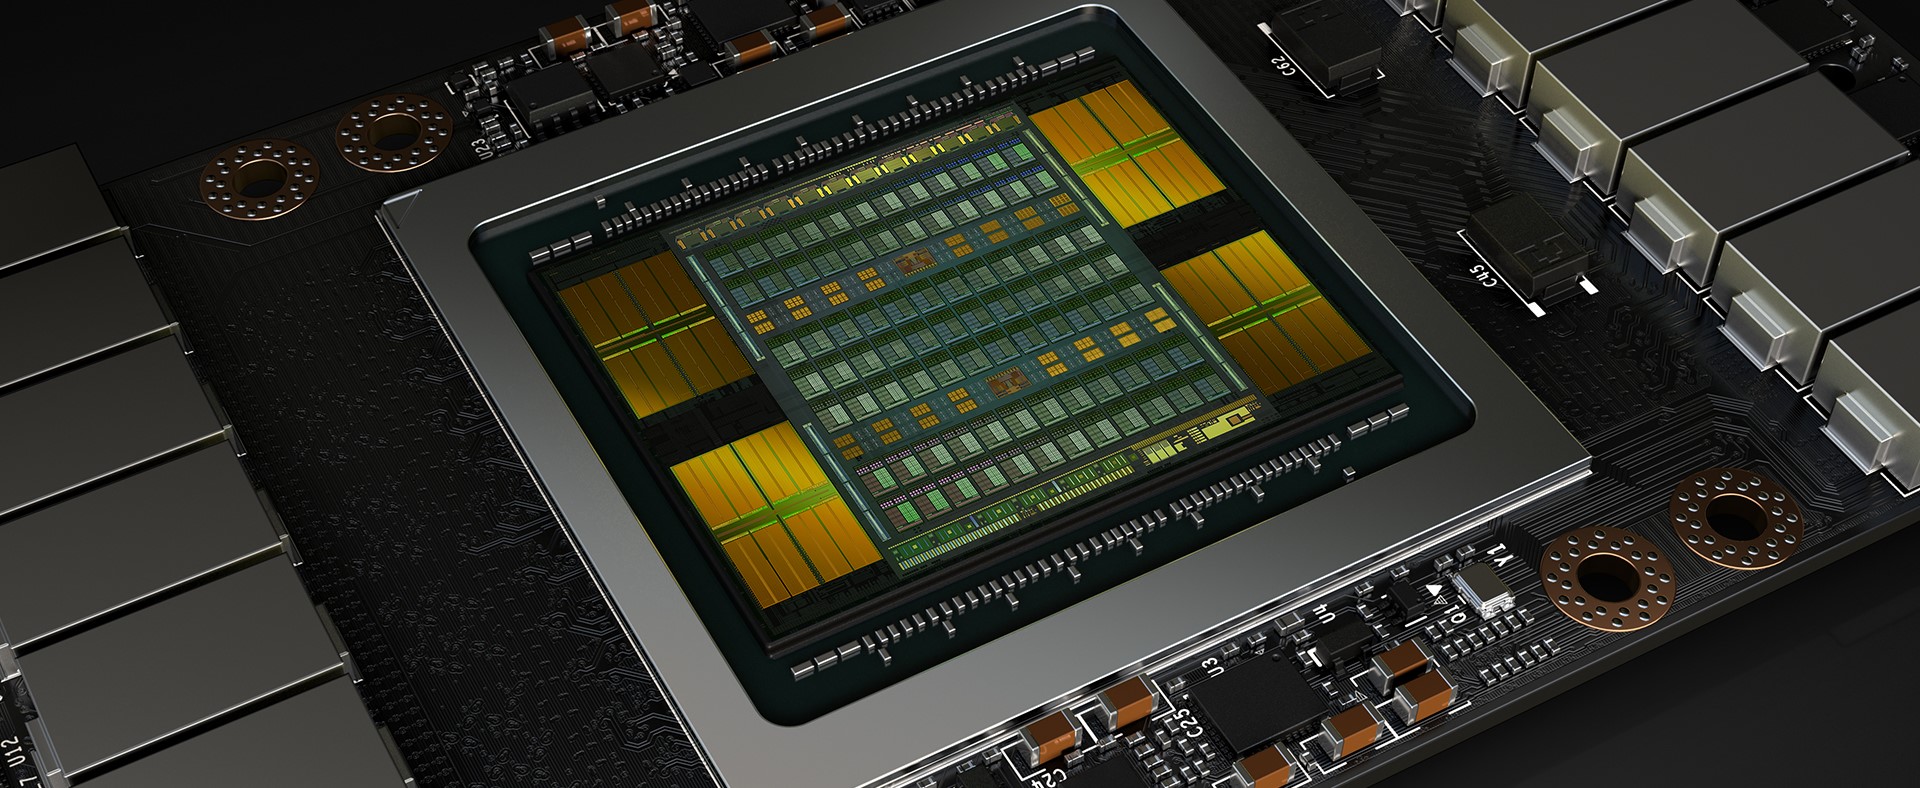
So what if it’s a GPU discrete? in my opinion discrete GPU compared to iGPU, discrete GPU is more independent in processing graphics on a PC so it does not affect CPU performance which makes both run optimally. Meanwhile, the iGPU because it attaches to the APU/CPU will certainly reduce the CPU allocation ration on the APU chip so that it makes both of them not too optimal and also because each chip has a power limit for every processing that occurs sometimes there will be a bottleneck / overheat if the CPU and GPU do heavy tasks simultaneously.

So which one is suitable for you iGPU or Discrete GPU? So here I will break it down into 2 points:

  • Integrated GPU

Integrated GPU is suitable for those of you who need a budget-oriented device. So because the iGPU is a bundle with a CPU, the cost of APU is usually more economical (and also power efficient) because you don’t need to buy a GPU anymore and you can also still upgrade the discrete GPU in the future. Even so, APUs have CPU/GPU performance that is not too optimal compared to dedicated CPUs/GPUs.

  • Discrete GPU

Discrete GPU is suitable for those of you who need a performance-oriented device. So because the CPU and GPU are dedicated or have their own space. CPU/GPU performance becomes more optimal because it does not share the chip allocation and each hardware has its own power limit. Even so, generally discrete GPUs cost more than APUs.

Okay, so have you determined which one to choose?

Aspect Ratio Type 16:9 4:3 21:9 Etc and Its Use

Have you ever edited a photo / video or looked at the screen specifications to find an aspect ratio like in the title of this article, be it 16:9 16:10 4:3 21:9 etc. Maybe someone doesn’t know or maybe I don’t know, anyway I’ll explain to you the various aspect ratios and naivety in general. Ok, let’s start the list:

  • Aspect Ratio 16:9

We start this list with the most commonly used aspect ratio for video, 2017 cellphone screens and below ,and monitors. This aspect ratio is often used for the creation of other content videos because of the screen devices that mostly support it. For example, the majority of videos on Youtube use 16:9 ratio-based videos with resolutions that follow be it 720p, 1080p, 1440p or 4k. And in addition, when we take videos or photos on the camera (cellphone or dslr) there is always a resolution option at 16:9.

  • Aspect Ratio 9:16

Actually, this aspect ratio is a 16:9 aspect ratio, but on vertical side. This aspect ratio is a portrait version of 16:9 which brings it to 9:16. We often find its use when we take pictures and videos in portraits and now there are many platforms that support this aspect ratio such as Youtube, Instagram and TikTok (now it’s booming). Although many platforms that support the content are not as much as the landscape version.

  • Aspect Ratio 4:3

For the 4:3 aspect ratio, it has actually existed from antiquity since the beginning of tube TVs and LCD flooding the market. This aspect ratio is also often encountered when we see old videos on YouTube or your old photos. Even so, this aspect ratio is also still used on your camera, be it a cellphone or dslr, this aspect ratio is always there and is an option when you want to take photos or videos.

  • Aspect Ratio 1:1

Next the aspect ratio is 1:1 or square and this aspect ratio is the same age or older than 4:3. Almost the same as 4:3, we still find this aspect ratio in content on the internet. On your camera, there is also usually an option for this aspect ratio, both for shooting and video.

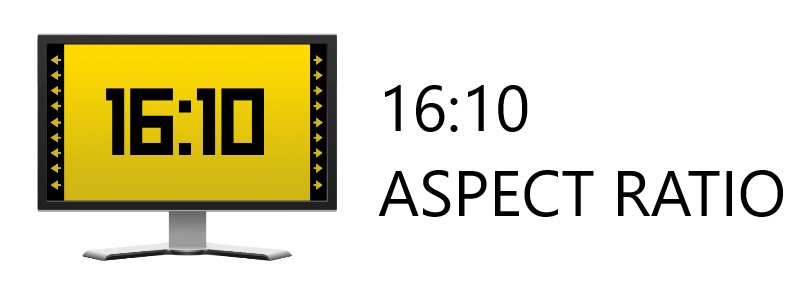
  • Aspect Ratio 16:10

This aspect ratio existed before 16:9 and is commonly used on mobile widescreen monitor screens, and tablets with slight widening. Although rarely there is still some content that uses this aspect ratio, both photos and videos that we can find today. This aspect ratio has been rarely encountered since 2008 and is an upgraded version of 16:9 with a slight widening.

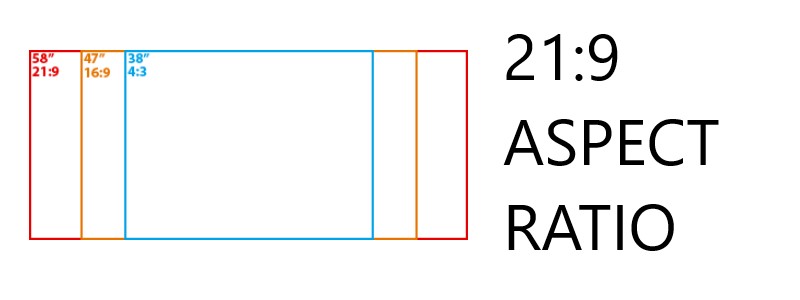
  • Aspect Ratio 21:9

How about a lot of what I mention and for aspect ratio this is often called ultrawide on the monitor and for content creation call this the aspect ratio cinemascope because it is often used for cinematic videos. According to its use, this aspect ratio is often found on computer monitors with the name ultrawide monitor and on smartphones we can also sometimes find it in the flagship series.

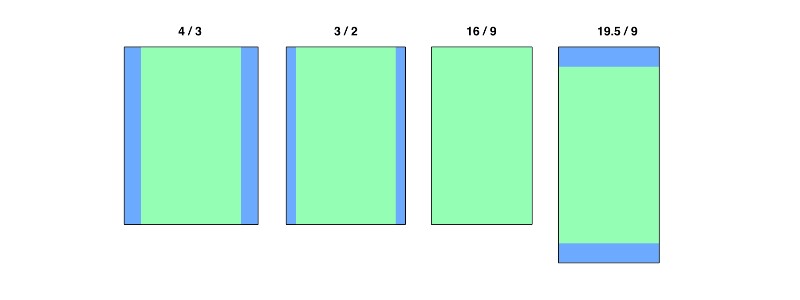
  • Aspect Ratio 19.5:9

The last one is an aspect ratio of 19.5:9, and the latter we often find in the aspect ratio of your smartphone. Although it is relatively new but because many industries have adopted this aspect ratio for the screen size of their mobile phone production this aspect ratio is increasingly booming, and now many content creators are starting to use this aspect ratio for their content creation because they are estimating for mobile phone users and also even though users commonly use aspect ratio of 16:9 or 16:10, users can still watch videos with a little black bars above the bottom but it doesn’t matter.

Well maybe that’s just the aspect ratio that is commonly used today according to what I can mention, so the point is that each aspect ratio has its own use and purpose.

Best Video Editor Apps For Android

Currently, with the development of video editing technology, it can also be done on the Android OS. Although when compared to Video editors on PC, video editors on Android have limitations on several features, but video editors on Android now little by little adding more editing features just like on PC. And of the many applications on Android, here are some of the applications that I think are the best for now:

  • Kinemaster

Yep, I put kinemaster in the first list of this list. Kinemaster has very complete features compared to other editors which, among others, can make multi-layer video editing more than other applications. Furthermore, for my opinion features such as greenscreen PiP (Picture in Picture), transitions, audio filter, greenscreen.. etc which I think the features are more mature than others. And finally the community of kinemaster in my opinion is the biggest, you can easily find tutorials or ask questions through kinemaster editing forums.

  • Powerdirector

Moving on to second I think PowerDirector deserves to be crowned number two. As a consideration I chose this application is the import and rendering support up to 4K 60fps. In addition, although the features are not as complete as kinemaster, PowerDirector offers core features with some restrictions such as limiting the number of layers and simpler layer customization. Even so, the powerdirector has an interface that I think is easier to master and its features are relatively close to being able to match the kinemaster.

  • Viva Video

Thirdly there is Viva Video with resource features that vary greatly from video filters, audio and many other templates making viva video worthy of being ranked third in my version. With the same core features as the video editor above Viva Video prioritizes a user friendly interface and its many feature resources are with beautification making it on a video editor that is suitable for the majority of girls (which guys also exist). One of the viva video features that are not in other video editors is beautify, which can make your face better looking by importing your video and adding the beautify effect in this application.

  • Filmora Go

With the advert go in it filmora go is indeed devoted to video editors that are simple & problem solving. Filmora go in my opinion is simpler than the video editor above and only offers important feature features with minimal customization even so filmora go is specifically for fast video editing. Even so, filmora Go you can rely on for your daily light editing.

So guys, which of these android video editor applications do you think is the best or do you have other choices besides on this list? Well this list is an experience from what I’ve known all along and maybe it could be wrong CMIIW. So the point is to choose any application that you like and are comfortable to use because what I recommend is not necessarily suitable for you. Happy editing guys 😀

How to Screen Mirroring Android to PC or Laptop

Want to try live streaming but with android games & you don’t know how to mirror your Android screen to your PC or Laptop? Here I will reveal how to mirror your Android screen & for its own way, there are actually 2 interface options which include:

  • Mirroring via USB cable

Mirroring using a USB cable in my opinion is the fastest and the latency is minimal with good image quality as well. But for the drawbacks you have to enable first in the developer option & enable USB Debugging. To activate this feature is not as simple as when you are mirroring via Wifi & that’s the drawback in my opinion (complicated to connect) – also you are not free to move because android must be plugged in USB when mirroring with a cable.

  • Mirroring via Wifi

Furthermore, for screen mirroring using wifi, in my opinion, it is more convenient rather than using a USB cable. Mirroring with Wifi also depends on the specifications of the Android Wifi modem and Router (For now Wireless AC is fast & affordable). With poorer quality & latency than using a cable, another advantage of Wifi mirroring is that you can be free anywhere in mirroring mode as long as it is within range of a wifi router.

Well that’s it for the interface option in mirroring & maybe there are actually other options but I didn’t include it because it’s not worth it (e.g. bluetooth). And furthermore below I will mention android applications that support mirroring with the 2 options above & The application includes:

  • Vysor

The first option you can use Vysor, with its compatibility you can install Vysor through an installer application or just with a simpler browser extension. In addition, Vysor also supports a variety of OS, be it Windows, Linux or MacOS.

  • APowerMirror

Next up is Apowermirror, the same as Vysor, Apowermirror offers more complete features such as cross platform support. So you guys can mirroring android to PC & also vice versa. In addition to these other features are whiteboard and mirroring recording built in.

Well so I think whatever the application is what matters is the stability and quality of the mirroring itself. I can’t say this one is better & on the contrary because each of the above applications is always evolving steadily (and there is other option too, that you can find yourself). So just choose the one that suits you.

Definition of Stereo, Mono, 2.1, 5.1 and 7.1 Speaker Settings

Surely you have seen speaker products be it stereo, 2.1, 5.1 and 7.1. Actually, the numbers just now explain the specifications of the speakers. Ok, it doesn’t take long for us to discuss it, starting from what you have heard or maybe what you are currently using, namely:

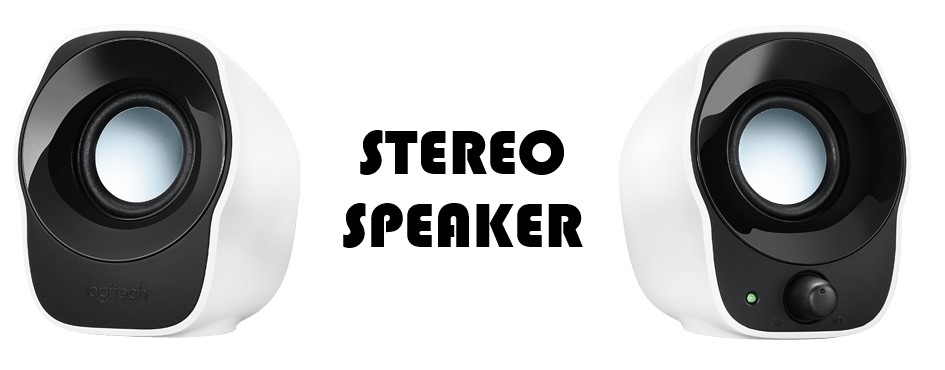
  • Stereo Speakers

The first and deliberately discussed first is stereo speakers, from smartphone products, TVs, PCs, Laptops.. etc is using a stereo implementation that uses 2 left and right speakers to get the sound out. For sound quality is also more immersive for this stereo system so it is very popular and adapted for a wide variety of equipment that requires speakers for entertainment. For now, there are also a lot of developments in terms of software for stereo systems that you may often hear about, including Dolby Stereo Surround Sound, DTS Surround sound… etc. By using this feature, you can emulate surround sound on your stereo speakers for a more immersive experience of listening to movies or songs and seem real sound position.

  • Mono Speakers

The second is a mono speaker which means that it only uses one speaker to make the sound. Mono-type speakers are still used in your electronic equipment. Mono speakers can save space so that they are easy to apply to various electronic equipment that is not specifically for entertainment, and although not specialized, there are still many that are made for entertainment purposes, you know. You can still find this type of mono speaker on your electronic devices such as bluetooth speaker clocks, portable radios, smartphones. etc

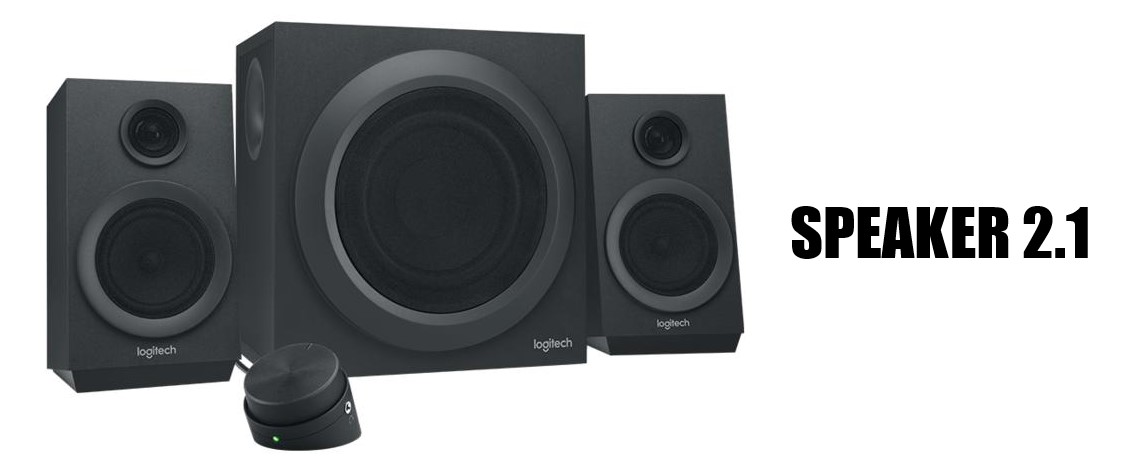
  • Speaker 2.1

Furthermore, the third and what is starting to be widely used for home entertainment / audio systems today is the 2.1 speaker, we can observe from the name, namely 2.1 which means that this speaker is a stereo speaker with additional woofer speakers. The woofer speakers will cope with bass sound/low frequency sound so the audio quality is better than stereo only. This speaker has been in the market and has been very widely used from home theater, PC and also car audio. And also this speaker system already supports Dolby surround sound and DTS Surround sound for a more immersive experience.

  • Speaker 5.1

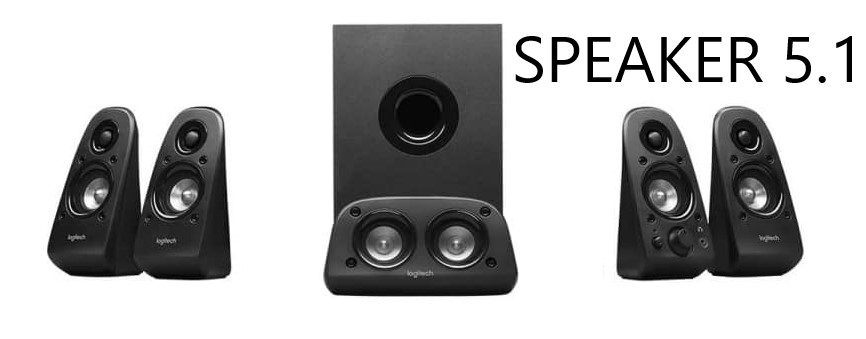
After we know the speaker system, then we go to the next level of audio system, namely speaker 5.1 and again the same as the name implies, this speaker system uses 5 speakers that are installed around the room and then added with 1 subwoofer. For the 5.1 speaker, it is relatively rarely used and is usually only used for home theaters or those that require a more real level of sound immersivity. For the installation of this speaker is quite time-consuming and for the price is mid to high so it is rarely adapted by budget friendly people. Usually this 5.1 surround system uses Dolby/DTS.

  • Speaker 7.1

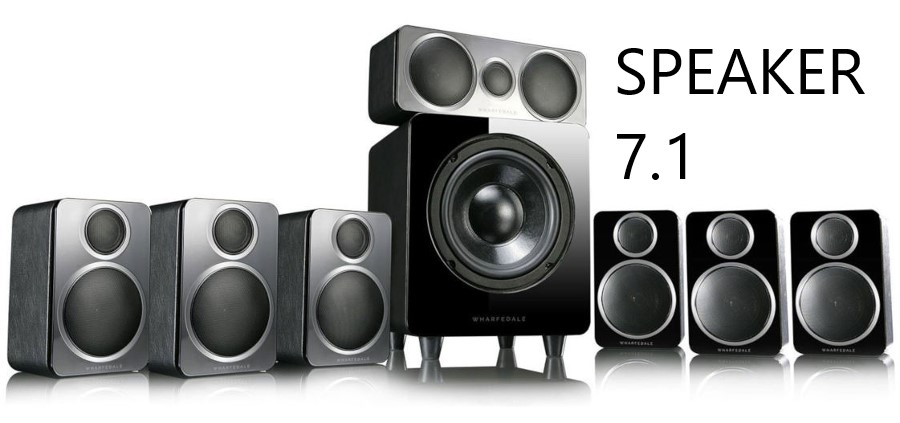
Ok finally we are heading towards the highest speaker system for now which is Speaker 7.1. Equipped with 7 speakers around the room and 1 woofer, it is guaranteed to make your experience when watching movies or music that supports 7.1 will be very immersive and real. For this speaker system, we can find it at your favorite cinema and also at the home theater. And almost the same as the 5.1 speaker, the installation of this speaker is quite time-consuming because it must be suitable for the placement of each speaker but all of this will be really worth it with the experience you will get later. Just like others, usually this surround system is combined with Dolby Surround or DTS Surround.

That’s the kind of speaker system subjectively based on my experience. Of course, the speaker system has its own market and for different people. Personally, I would choose 2.1 speakers for my PC room and 5.1 speakers for my TV room, with budget considerations as well.. Hehe. So that’s it if you think it’s the most suitable speaker system, what kind of speaker system do you think is the most suitable?