Hello, for those of you indihome users, you may already know that indihome provides a public ip to its customers even though it’s a dynamic type that changes. Even so, we can still take advantage of it by using DDNS to anticipate the dynamic Public IP. Well, it’s the dynamic IP problem, in this article there is a way to open a certain port for a specific IP using the Port Forwarding feature on the router (in this case, I give an example of the F609 type). By opening the port on the router we will be able to be accessed by the internet to be able to activate the service according to the port opened.
Examples of frequently used service ports:
– FTP: 21, 20
– SSH: 22
– Winbox: 8291 (Mikrotik)
– Web HTTP: 80
– Web HTTPS: 443 (SSL)
– Telnet: 23
– Mail SMTP: 25
– Mail POP3: 110
– Mail IMAP: 143
– NTP: 123
– PPTP: 1723
Furthermore, if you already know the port service you want, we will continue to port forwarding, for this time I will use a router modem from indihome type ZTE F609 (incidentally that’s what I use). Ok, next, to log in to the router, you can use a cellphone / laptop / PC that is already connected to the router, either using a lan cable or using WiFi. If you are already connected, enter ip 192.168.1.1 in the address bar as shown below.
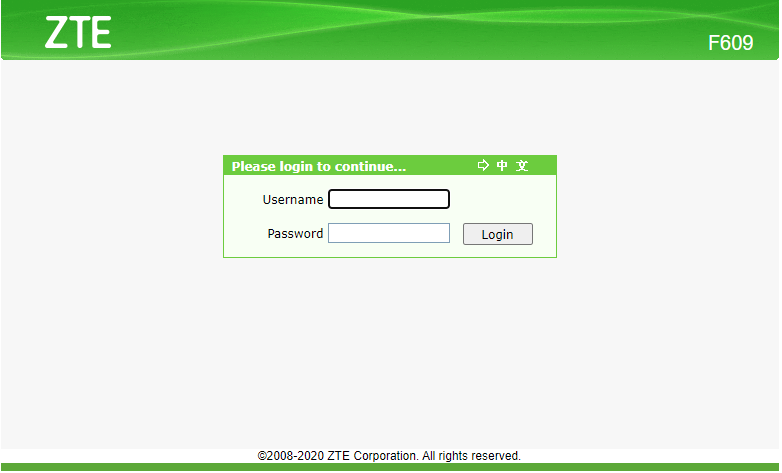
After that, enter the username and password, usually if it has not been changed you can enter the credential below:
Username: user
Password: user
Username: admin
Password: Telkomdso123
After logging in you will be redirected to the webfig from the router. Go to the Application tab > Application List > Click here to add an application. Then next you will find the display as below:
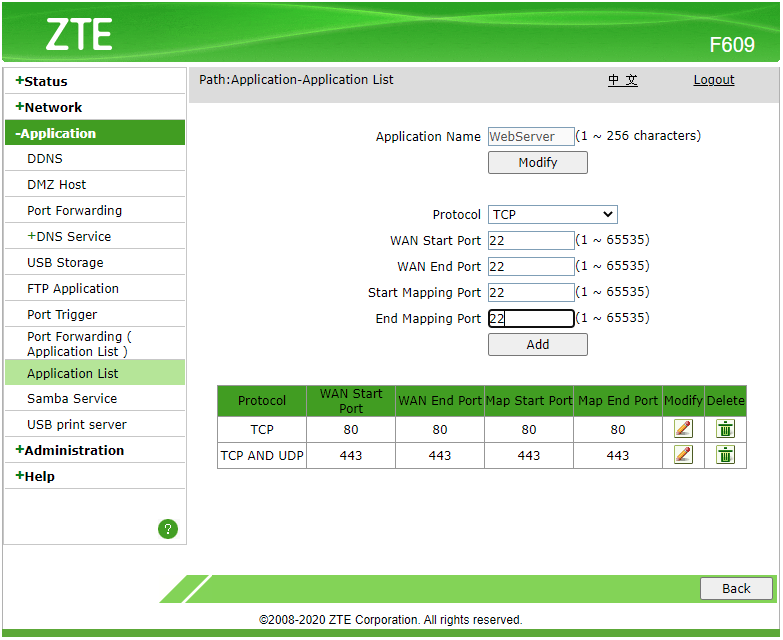
From here you can enter the Application Name (free of contents), if it is on me because I want to use for the webserver then I open port 80 and port 443. And as above I want to open port 22 for SSH, then I enter port 22 in the field above (you can fill in the port according to the service you want to use). After finishing pressing the add button, the port settings will appear in the table below as shown below.
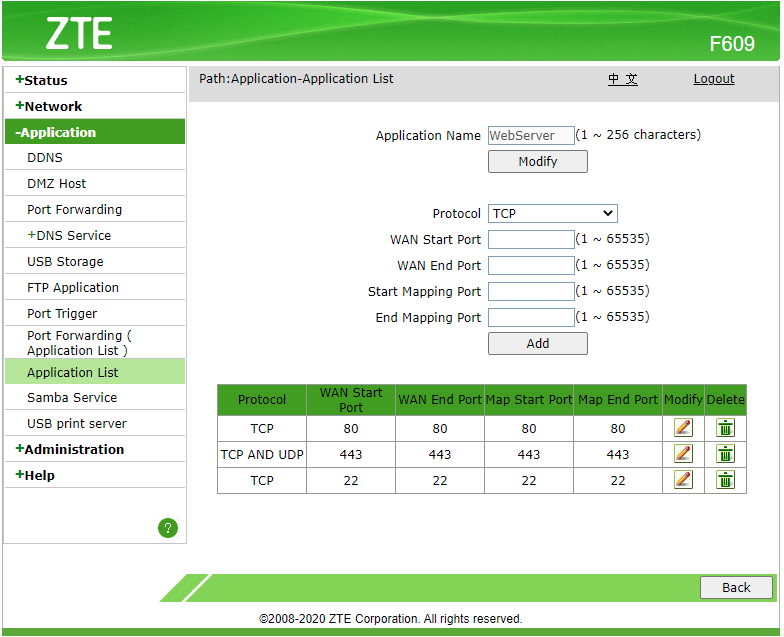
After finishing opening the port on the Application List, then we go to the last stage, which is to apply the Application List to the IP we want. So for example, if we install a webserver connected to the router with a Static IP of 192.168.1.150, then we have to apply it to the Application List with the port that we created earlier (if on my port 80, 443, port 22 I deleted it because just make an example of it) to IP 192.168.1.150. With the example below, you enter the IP that you want to open the port in the LAN Host IP Address and then in AppName select the Application List that you have created then click Add. For example, as shown below.
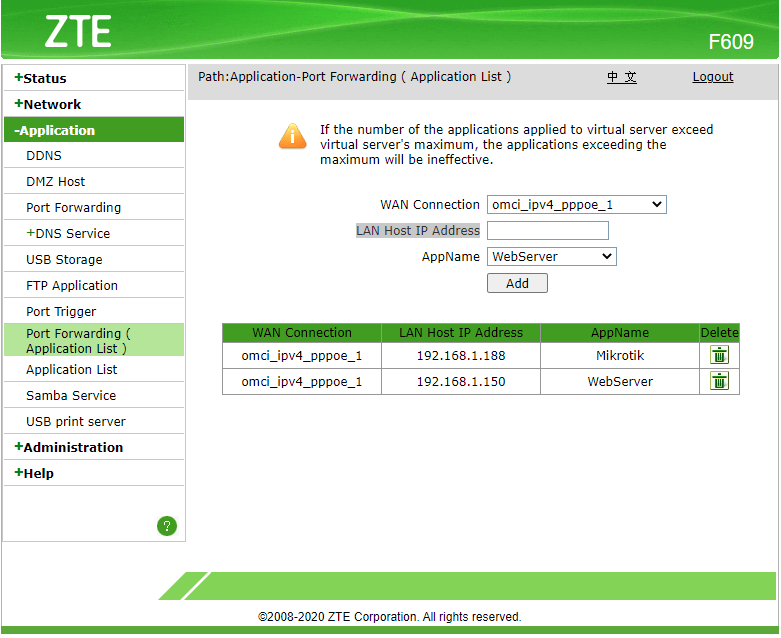
Ok now you have finished opening the port on the IP you want. For the last stage, we will check whether the rule is active or not. We can see it on the webfig also on the Application > Port Forwarding tab. If it is active, there will be a green tick on the left side followed by the rule you have created. For an example of how it looks, you can see it in the image below.
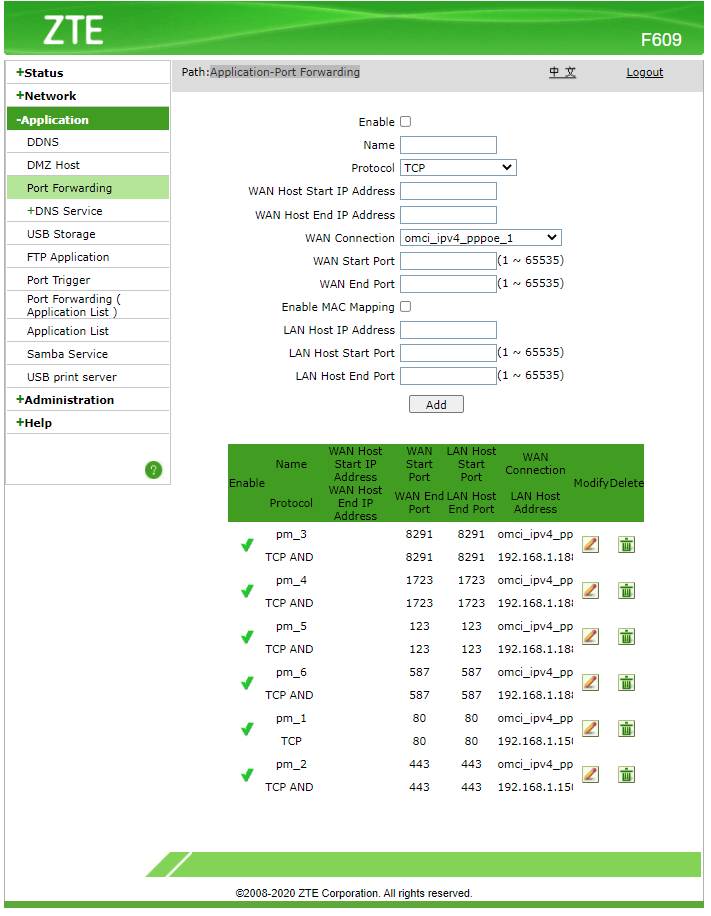
Well as you can see, the port opening rule is already enabled (in my case it is 192.168.1.150). So that’s how port forwarding if you use an indihome ISP with a ZTE F609 router. If you use another router, maybe it can also be applied with different webfig settings. In the other hand, if you understand the concept, it is more or less the same for its application, so you don’t have to worry. Ok that’s how Port Forwarding on ZTE F609!


